
Are you ready to start working with Angular? Maybe you’ve heard about this powerful framework but have no idea where to start. Don’t worry - we’ve all been there! In this guide, I’ll walk you through setting up your development environment and creating your first Angular 19 application, even if you’ve never written a line of TypeScript before. By the end of this post, you’ll have a working Angular app and understand the basic building blocks that make this framework so popular among developers worldwide. Let’s embark on this coding journey together!
Setting Up Your Development Environment
Before getting into Angular 19, you’ll need to set up your development environment with the essential tools:
Visual Studio Code (VS Code)
VS Code is a lightweight, powerful code editor that works exceptionally well with Angular development:
- Download VS Code from the official website
- Run the installer and follow the prompts
Node.js and NPM
Node.js is a JavaScript runtime that includes NPM (Node Package Manager), which you’ll use to install Angular:
- Download Node.js from the official website
- Choose the LTS (Long Term Support) version for stability
- Run the installer and follow the prompts
- Restart VS Code if it’s running.
Using the VS Code Integrated Terminal
VS Code comes with a built-in terminal that makes development workflow seamless:
- Open VS Code
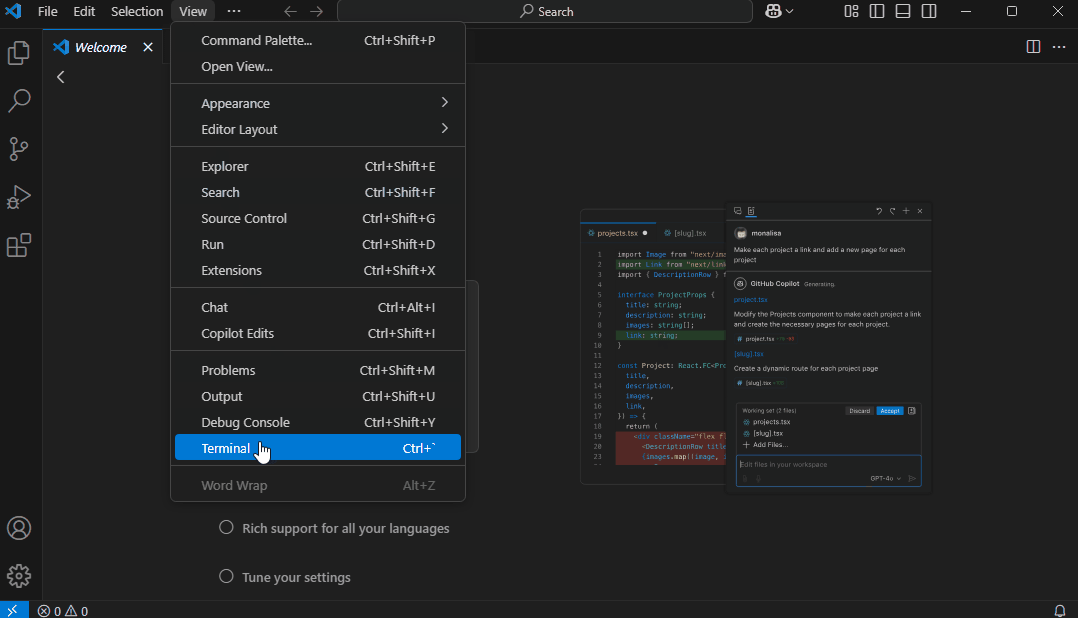
- Access the integrated terminal by:
- Using the keyboard shortcut:
Ctrl+`(backtick key) - Or navigating to View > Terminal in the menu
- Or clicking on the Terminal icon in the sidebar
- Using the keyboard shortcut:
The integrated terminal provides all the functionality you need without switching between applications. You can:
- Run multiple terminal instances (click the + icon)
- Split terminals horizontally or vertically
- Navigate through command history with up/down arrows
- Use tab completion for commands and filenames
Enable Script Execution in Windows
Windows has security measures that prevent scripts from running by default. You’ll need to enable script execution to use Angular CLI:
- Open PowerShell as Administrator (right-click and select “Run as Administrator”)
- Run the following command:
Set-ExecutionPolicy -Scope CurrentUser -ExecutionPolicy RemoteSigned
Installing Angular CLI
The Angular Command Line Interface (CLI) helps you create projects, generate code, and perform various development tasks:
- Open VS Code’s integrated terminal and run:
npm install -g @angular/cli
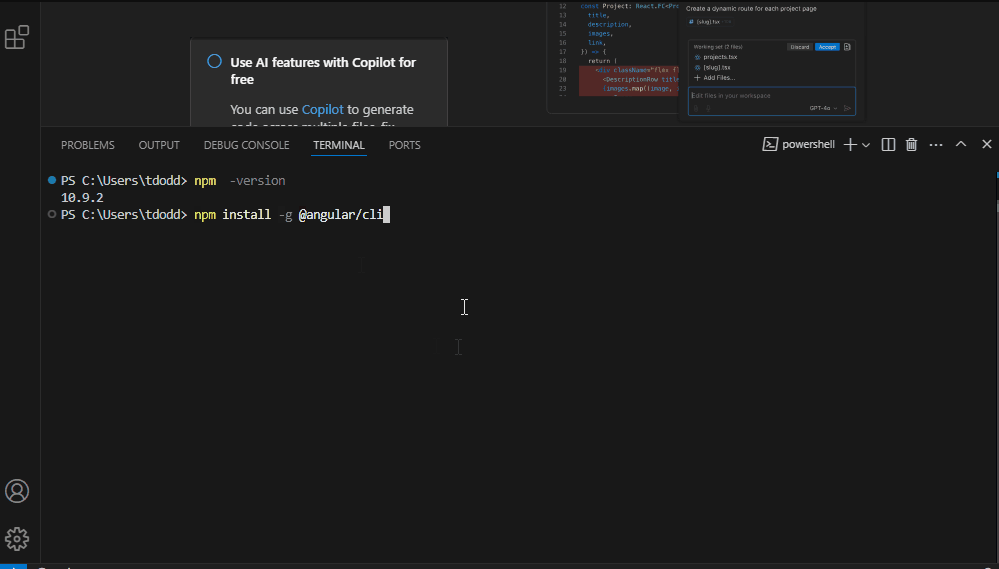
- Verify the installation:
ng version
Creating Your First Angular 19 Application
Now that you have the necessary tools installed, let’s create a simple “Hello World” application:
- In VS Code’s integrated terminal, navigate to your desired project location:
mkdir C:\projects
cd C:\projects
(or your preferred directory)
- Create a new Angular project:
ng new hello-angular
- When prompted, choose:
- Which stylesheet format would you like to use? CSS
- When asked about Server-Side Rendering? No
- VS Code will ask if you want to open the new project. Select “Open” to load it directly. If you didn’t get that prompt, navigate into your project folder and open it:
cd hello-angular
code .
- Start the development server in the VS Code terminal:
ng serve --open
Your browser should automatically open to http://localhost:4200/ displaying your new Angular application!
Understanding Angular 19’s Modern Architecture
Angular 19 has embraced a streamlined approach with standalone components, eliminating the need for NgModules in most scenarios. Here’s what you need to know:
Standalone Components
Components are the building blocks of your application, and in Angular 19, they’re self-contained:
import { Component } from '@angular/core';
import { RouterOutlet } from '@angular/router';

@Component({
  selector: 'app-root',
  standalone: true,
  imports: [RouterOutlet],
  templateUrl: './app.component.html',
  styleUrls: ['./app.component.css']
})
export class AppComponent {
  title = 'hello-angular';
}
Key differences:
- The
standalone: trueproperty makes the component independent - Dependencies are imported directly in the
importsarray - No need for NgModule declarations
Bootstrapping the Application
The main entry point has also been simplified:
// src/main.ts
import { bootstrapApplication } from '@angular/platform-browser';
import { appConfig } from './app/app.config';
import { AppComponent } from './app/app.component';

bootstrapApplication(AppComponent, appConfig)
  .catch((err) => console.error(err));
Application Configuration
Configuration is centralized in a dedicated file:
// src/app/app.config.ts
import { ApplicationConfig, provideZoneChangeDetection } from '@angular/core';
import { provideRouter } from '@angular/router';

import { routes } from './app.routes';

export const appConfig: ApplicationConfig = {
  providers: [provideZoneChangeDetection({ eventCoalescing: true }), provideRouter(routes)]
};
Routing Setup
Routing is handled through standalone route configurations:
// src/app/app.routes.ts
import { Routes } from '@angular/router';

export const routes: Routes = [
  // Your routes go here
];
Creating a Custom “Hello World” Component
Let’s modify our application to display a customized greeting. Use the VS Code terminal for all commands:
- Generate a new standalone component:
ng generate component greeting --standalone
- Edit the greeting component class:
// src/app/greeting/greeting.component.ts
import { Component,signal } from '@angular/core';

@Component({
  selector: 'app-greeting',
  imports: [],
  templateUrl: './greeting.component.html',
  styleUrl: './greeting.component.css'
})
export class GreetingComponent {
  name = signal('Angular Developer');

  changeName() {
    this.name.set('Awesome Angular Developer');
  }
}
- Edit the greeting component template:
<!-- src/app/greeting/greeting.component.html -->
<div class="greeting-card">
    <h2>Hello, {{name()}}!</h2>
    <p>Welcome to Angular 19</p>
    <button (click)="changeName()">Change Name</button>
</div>
- Add some basic styling:
/* src/app/greeting/greeting.component.css */
.greeting-card {
  border: 2px solid #1976d2;
  border-radius: 8px;
  padding: 20px;
  margin: 20px;
  text-align: center;
}

button {
  background-color: #1976d2;
  color: white;
  border: none;
  padding: 10px 20px;
  border-radius: 4px;
  cursor: pointer;
}
- Import and use this component in the app component:
// src/app/app.component.ts
import { Component } from '@angular/core';
import { RouterOutlet } from '@angular/router';
import { GreetingComponent } from './greeting/greeting.component';

@Component({
  selector: 'app-root',
  imports: [RouterOutlet, GreetingComponent],
  templateUrl: './app.component.html',
  styleUrls: ['./app.component.css']
})
export class AppComponent {
  title = 'hello-angular';
}
- Update the app component template:
<!-- src/app/app.component.html -->
<div class="content">
  <h1>{{title}}</h1>
  <app-greeting></app-greeting>
</div>
Services in Standalone Angular
Services provide functionality across components:
// Creating a service with the CLI:
// ng generate service data

import { Injectable } from '@angular/core';

@Injectable({
  providedIn: 'root'
})
export class DataService {
  constructor() { }

  getData() {
    return ['Item 1', 'Item 2', 'Item 3'];
  }
}
The providedIn: 'root' property makes the service available application-wide without needing to register it in a module.
Templates and Data Binding
Angular continues to use its powerful template syntax for data binding:
<!-- One-way data binding -->
<h1>{{title}}</h1>

<!-- Property binding -->
<img [src]="imageUrl">

<!-- Event binding -->
<button (click)="doSomething()">Click me</button>

<!-- Two-way binding (requires FormsModule in imports) -->
<input [(ngModel)]="name">
Running Your Modified Application
Save all your changes and make sure your development server is still running (or start it with ng serve in the VS Code terminal). Visit http://localhost:4200/ to see your customized Hello World application!
VS Code Terminal Tips for Angular Development
Here are some useful terminal commands you’ll frequently use in Angular development:
- Generate new standalone components, services, or interfaces:
ng generate component my-component --standalone
ng generate service my-service
ng generate interface my-interface
Shorthand version:
ng g c my-component --standalone
ng g s my-service
ng g i my-interface
- Build your application for production:
ng build --configuration production
- Run unit tests:
ng test
Next Steps
After mastering this basic setup, you can explore:
- Creating more complex components
- Setting up routing between different views
- Working with forms
- Making HTTP requests to backend services
- Using Angular Material for UI components
- Exploring Angular’s modern standalone architecture further
This blog post has introduced you to the fundamental concepts and setup required to begin your Angular 19 journey using VS Code’s integrated terminal. Remember, every expert developer was once a beginner - the key is to keep practicing and building. Before you know it, you’ll be creating impressive web applications with Angular’s powerful features. Happy coding!