
In this post, I’ll guide you through setting up Cloudflare to route traffic from your public domain to a local Kubernetes service—without exposing your IP address. Best of all, we’ll achieve this for free!
Step 1: Create a Cloudflare Account
- Sign Up: If you don’t already have a Cloudflare account, head over to Cloudflare’s website and sign up.
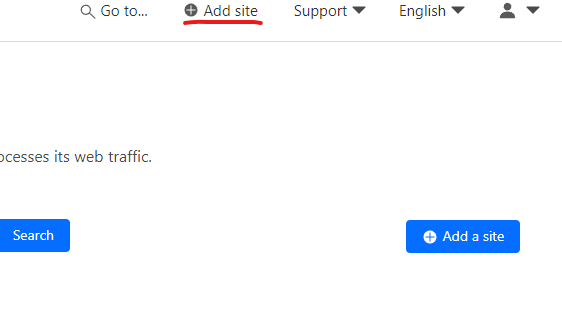
- Add Your Site: Click on “Add a Site” at the top and follow the instructions to add your domain (e.g.,
mysite.com) to Cloudflare.
Step 2: Set Up Zero Trust
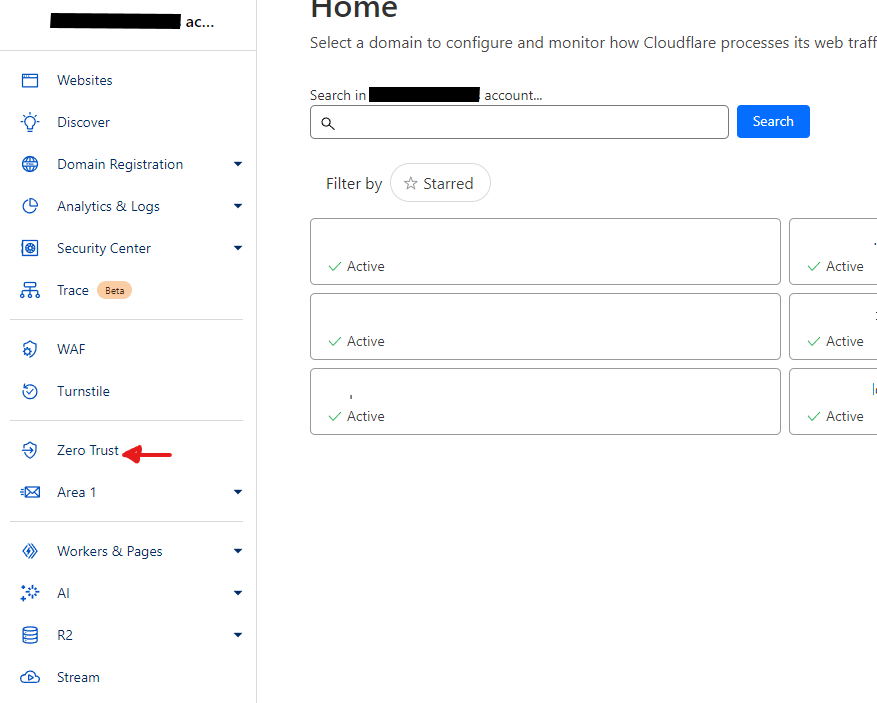
- Access Zero Trust: Navigate to the “Zero Trust” section in the Cloudflare dashboard.
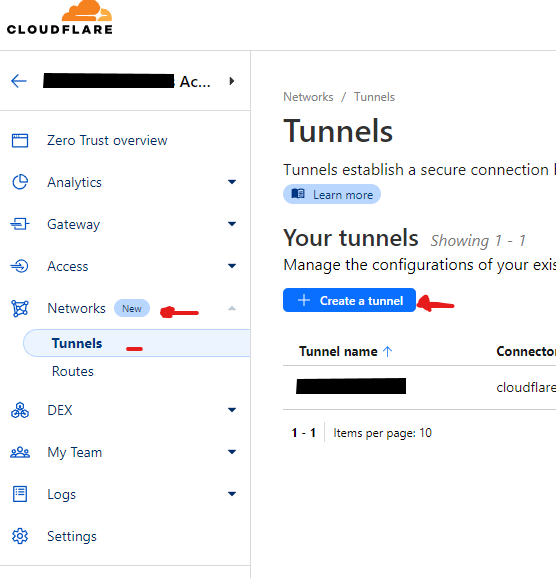
- Go to Networks and Tunnels: Select “Networks” and then “Tunnels.”
- Create a Tunnel: Click on “Create a Tunnel” and follow the steps until you reach the part where you’re prompted to install an agent.
Step 3: Install the Cloudflare Agent
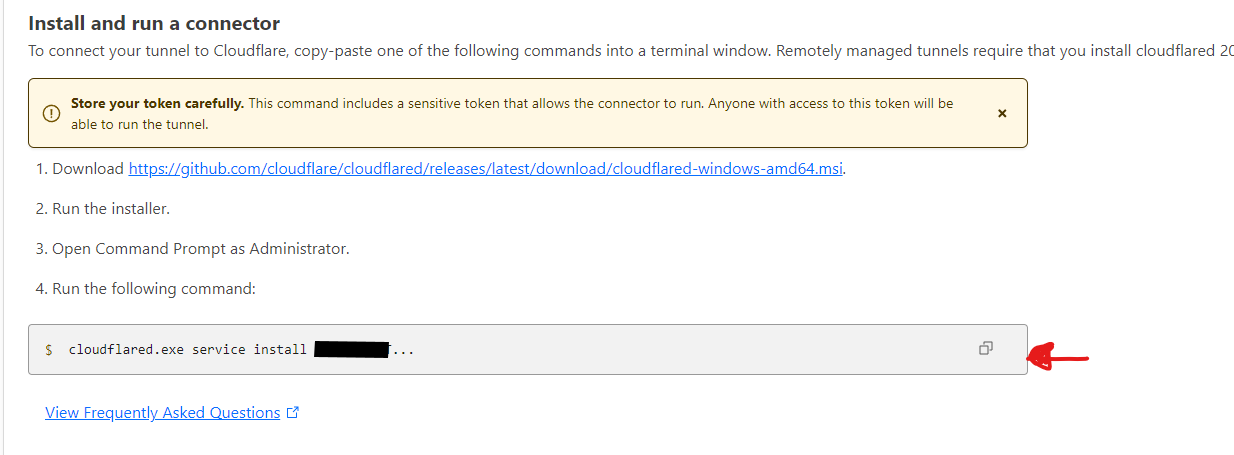
You have two options here: you can either download the agent and host it as you like, or you can host it in Kubernetes. Below, I’ll show you how to set it up in Kubernetes.
- Copy the Token: During the setup, you’ll see a command line with a token argument. Copy this token as you’ll need it later.
- Create a Manifest File: Create a file named
cloud-flare-tunnel.yamlwith the following content:
apiVersion: apps/v1
kind: Deployment
metadata:
  labels:
    app: cloudflared
  name: cloudflared-deployment
  namespace: default
spec:
  replicas: 2
  selector:
    matchLabels:
      pod: cloudflared
  template:
    metadata:
      creationTimestamp: null
      labels:
        pod: cloudflared
    spec:
      containers:
        - command:
            - cloudflared
            - tunnel
            # In a k8s environment, the metrics server needs to listen outside the pod it runs on.
            # The address 0.0.0.0:2000 allows any pod in the namespace.
            - --metrics
            - 0.0.0.0:2000
            - run
          args:
            - --token
            - YOUR_TOKEN_HERE
          image: cloudflare/cloudflared:latest
          name: cloudflared
          livenessProbe:
            httpGet:
              # Cloudflared has a /ready endpoint which returns 200 if and only if
              # it has an active connection to the edge.
              path: /ready
              port: 2000
            failureThreshold: 1
            initialDelaySeconds: 10
            periodSeconds: 10
- Replace the Token: Replace
YOUR_TOKEN_HEREwith the token you copied earlier. - Deploy the Tunnel Agent: Run the following command to apply the configuration and deploy the tunnel agent:
kubectl apply -f ./cloudflare-tunnel.yaml
Step 4: Configure the Cloudflare Tunnel
Once deployed, head back to the Tunnels page in Cloudflare Zero Trust.
- If everything was set up correctly, your tunnel status should show as “Healthy.”
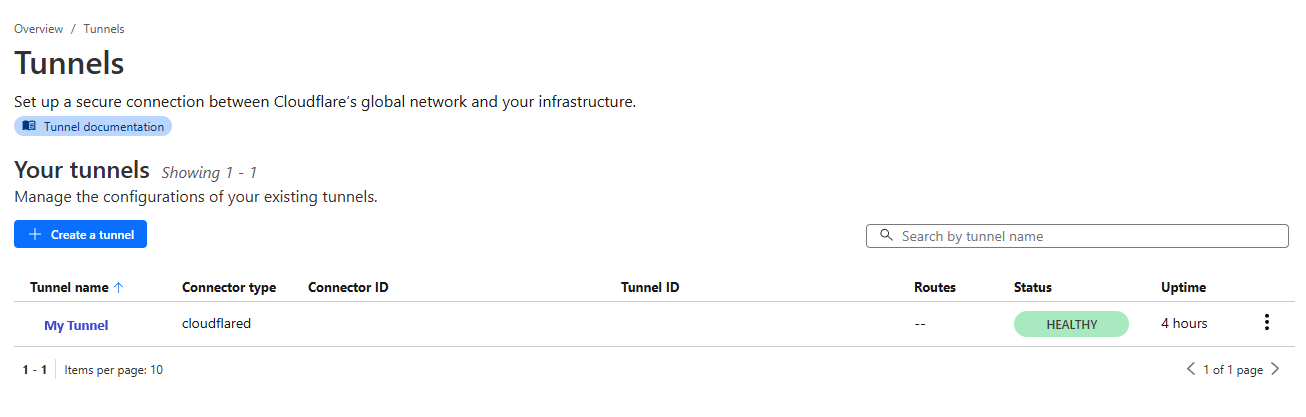
- Click the three dots next to your tunnel and select “Configure.”
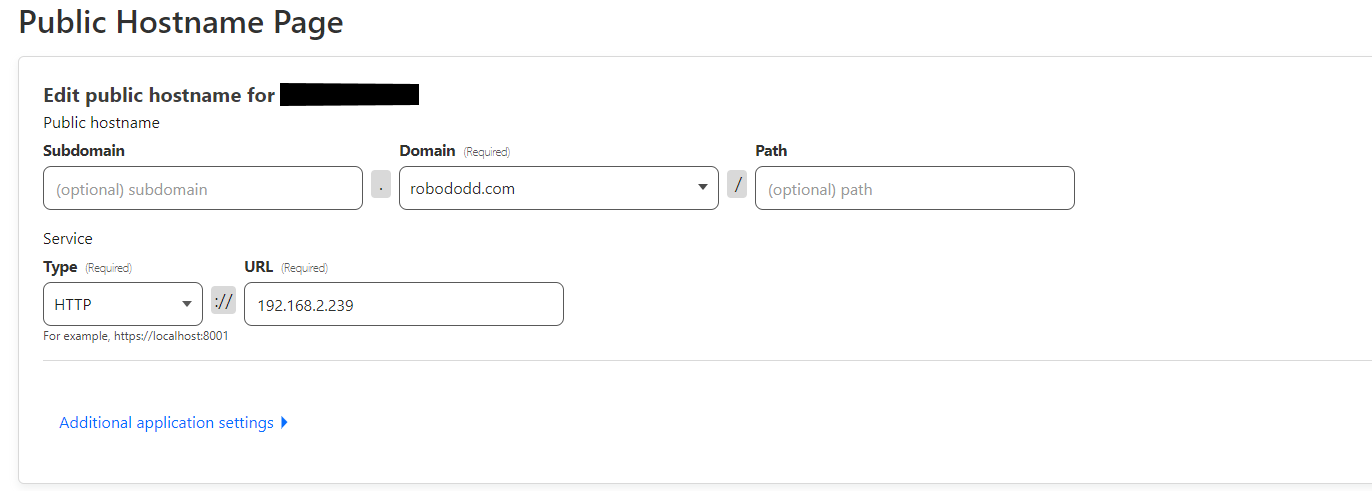
- Under “Public Hostname,” click “Add a Public Hostname.”
- Fill in the hostname you want to use (e.g.,
service.mysite.com).

- For the URL, enter the internal IP address or DNS name of the Kubernetes service you want to expose on your LAN.
Conclusion
With Cloudflare Tunnel and Zero Trust, you can securely expose services running on your local Kubernetes cluster to the internet—without ever revealing your public IP address. It’s a powerful way to enable external access for testing, demos, or even lightweight production use, all while keeping your infrastructure locked down.
And the best part? You did it without opening any ports on your router, configuring complex firewall rules, or spending a dime.
If you found this guide helpful or ran into any hiccups along the way, drop a comment or reach out—happy to help!