Adding a “Copy Code” button to your blog posts can make it much easier for readers to copy and use your code snippets. Follow these steps to implement it on your Ghost blog.
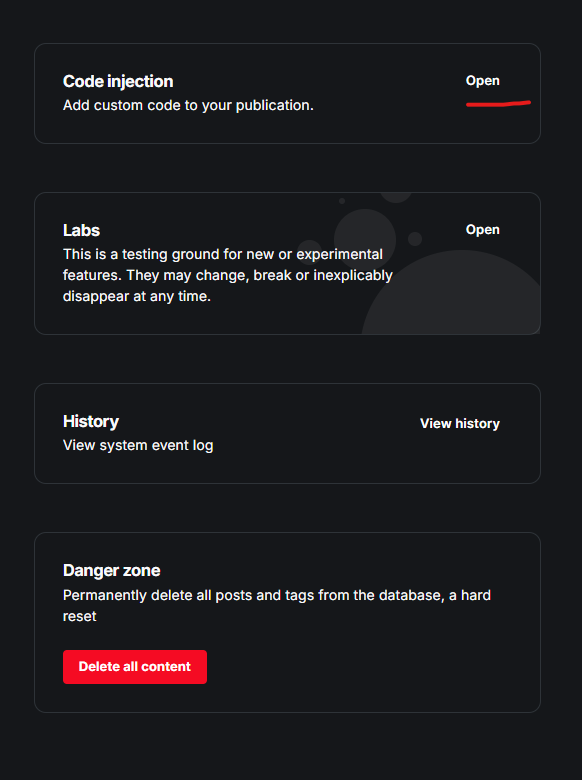
Step 1: Open the Code Injection Settings
- Go to your Ghost settings page.
- Scroll down to Advanced and select Code Injection.
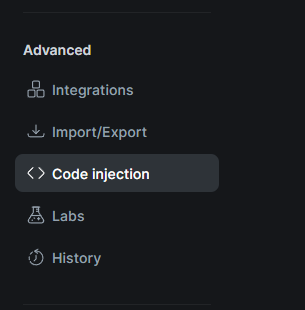
- Click on the Code Injection Card to open it.
Step 2: Add Styles for the Copy Button
In the Site Header section of the Code Injection settings, add the following code snippet. This includes the Font Awesome stylesheet (if you want to use icons) and the CSS styles for the “Copy Code” button:
<link rel="stylesheet" href="https://cdnjs.cloudflare.com/ajax/libs/font-awesome/6.7.2/css/all.min.css" integrity="sha512-Evv84Mr4kqVGRNSgIGL/F/aIDqQb7xQ2vcrdIwxfjThSH8CSR7PBEakCr51Ck+w+/U6swU2Im1vVX0SVk9ABhg==" crossorigin="anonymous" referrerpolicy="no-referrer" />

<style>
.copy-button {
           position: absolute;
            padding: 2px 12px;
            font-size: 12px;
            color: white;
            opacity: 0.6; /* Semi-transparent */
            border: none;
            border-radius: 4px;
            cursor: pointer;
            background: transparent;
            transition: opacity 0.3s ease;
            display:flex;
            flex-direction:row;
            gap:5px;
            align-items:center;

    }
    .copy-button:hover {
        opacity: 1; /* Fully opaque on hover */
        background: var(--ghost-accent-color);
    }
    .copy-button:active {
        transform: scale(0.95); /* Slightly shrink on click */
    }
    code[class*=language-],pre[class*=language-]{
      padding-top:40px;
    }
    pre[class*=language-] {

      margin-top:0px;
    }
</style>
Step 3: Add JavaScript for the Button Functionality
In the Site Footer section, add the following JavaScript to create the “Copy Code” button and make it functional:
    <script>
        // JavaScript to Add Copy Button

      document.querySelectorAll('pre').forEach(pre => {
          // Check if the pre element has a child code element
          if (pre.querySelector('code')) {
              // Create a wrapper div
              const wrapper = document.createElement('div');
              wrapper.className = 'pre-wrapper';
              wrapper.style.position = 'relative'; // Ensure the button is positioned properly

              // Insert the wrapper before the pre element in the DOM
              pre.parentNode.insertBefore(wrapper, pre);

              // Move the pre element inside the wrapper
              wrapper.appendChild(pre);

              // Create the copy button
              const button = document.createElement('button');
              button.innerHTML = '<i class="fa-regular fa-copy"></i>Copy'; // Add the icon and text
              button.className = 'copy-button';
              button.style.position = 'absolute';
              button.style.top = '6px'; // Adjust position as needed
              button.style.right = '6px';

              // Add the click event listener to the button
              button.addEventListener('click', () => {
                  // Create a temporary textarea to copy the code content
                  const codeContent = pre.querySelector('code').innerText;
                  navigator.clipboard.writeText(codeContent).then(() => {
                      button.innerText = 'Copied!';
                      setTimeout(() => button.innerHTML = '<i class="fa-regular fa-copy"></i>Copy', 2000);
                  }).catch(err => {
                      console.error('Failed to copy: ', err);
                  });
              });

              // Append the button to the wrapper
              wrapper.appendChild(button);
          }
      });
    </script>
Note About Font Awesome Icons
This setup uses a Font Awesome icon (<i class="fa-regular fa-copy"></i>) in the button for a polished look. However, using Font Awesome is optional. If you don’t want to use it, simply remove the <i> element from the JavaScript and keep only the text inside the button:
button.innerHTML = 'Copy';
Conclusion
That’s it! With this setup, every code block in your Ghost blog will have a “Copy Code” button. This small feature can significantly improve the user experience, especially for readers who regularly copy code snippets from your posts.
Feel free to customize the button styles and placement to match your blog’s theme. ?