
If you’re running a k3s cluster and want to expose services to the outside world, you might think you have to use something like MetalLB to assign local network IPs. While MetalLB is great for local access, it can feel overcomplicated if you don’t care about LAN IPs and just want remote access.
Fortunately, Cloudflare Tunnels offer a clean, secure, and LAN-agnostic way to expose services — no need to fiddle with IPs or firewall rules. You can even route traffic directly to a Kubernetes service by name. Let’s walk through how to do that.
Why Cloudflare Tunnel?
- No public IP needed
- End-to-end encrypted traffic
- Easy integration with Kubernetes
- Avoids port forwarding and complex networking
Step 1: Create a Kubernetes Service
Here’s an example of a Service for a simple Ghost blog:
apiVersion: v1
kind: Service
metadata:
  name: ghost-app-lb
spec:
  selector:
    app: ghost-app
  ports:
    - port: 80
      targetPort: 2368
      name: http
      protocol: TCP
And the corresponding Deployment:
apiVersion: apps/v1
kind: Deployment
metadata:
  name: ghost-app
  labels:
    app: ghost-app
spec:
  replicas: 1
  selector:
    matchLabels:
      app: ghost-app
  template:
    metadata:
      labels:
        app: ghost-app
    spec:
      containers:
      - name: ghost-app
        image: ghost:5.72.0
        imagePullPolicy: IfNotPresent
        ports:
        - containerPort: 2368
This creates a Ghost blog inside your cluster and exposes it through a Kubernetes service called ghost-app-lb.
Step 2: Set Up a Cloudflare Tunnel
1. Create a Cloudflare Account
- Visit Cloudflare.com and sign up if you don’t have an account.
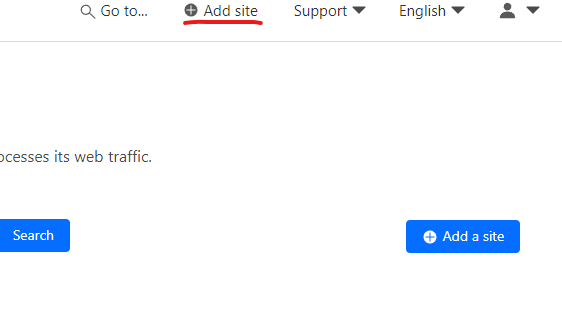
- Click “Add a Site” and follow the prompts to add your domain (e.g.,
mysite.com).
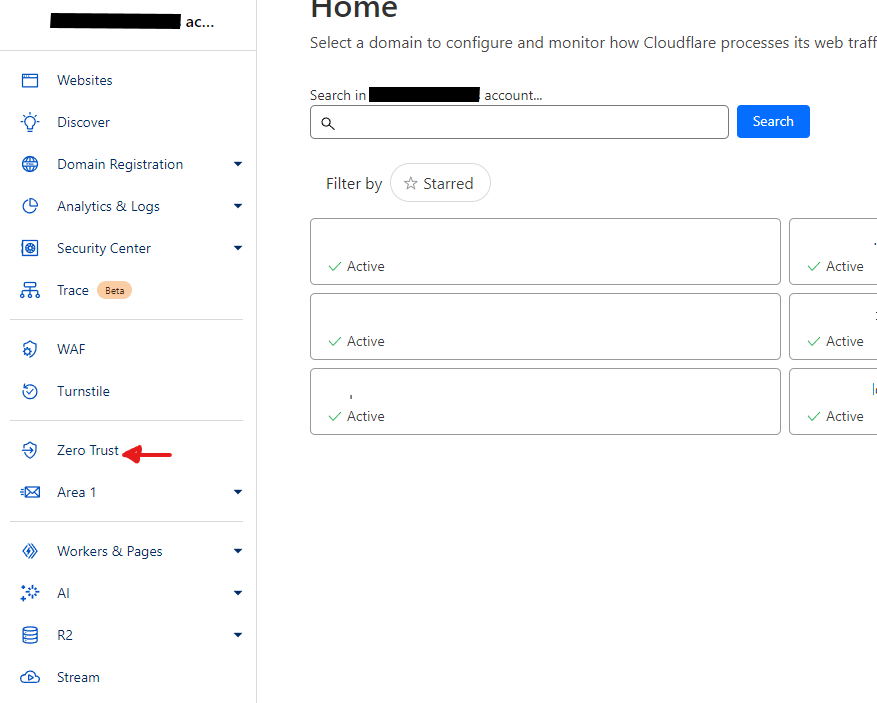
2. Enable Zero Trust
- Go to the “Zero Trust” section of your dashboard.
- Navigate to “Networks” > “Tunnels”.
- Click “Create a Tunnel”.
- You’ll be guided through steps until you’re prompted to install the
cloudflaredagent.
Step 3: Deploy the Cloudflare Tunnel Agent to k3s
You can run cloudflared as a pod in Kubernetes.
Copy the Token
During the tunnel creation process, Cloudflare will give you a token (as part of a command-line snippet). Copy that token — you’ll need it for the manifest.
Create the Deployment Manifest
Save the following as cloudflare-tunnel.yaml:
apiVersion: apps/v1
kind: Deployment
metadata:
  labels:
    app: cloudflared
  name: cloudflared-deployment
  namespace: default
spec:
  replicas: 2
  selector:
    matchLabels:
      pod: cloudflared
  template:
    metadata:
      creationTimestamp: null
      labels:
        pod: cloudflared
    spec:
      containers:
        - command:
            - cloudflared
            - tunnel
            # In a k8s environment, the metrics server needs to listen outside the pod it runs on.
            # The address 0.0.0.0:2000 allows any pod in the namespace.
            - --metrics
            - 0.0.0.0:2000
            - run
          args:
            - --token
            - YOUR_TOKEN_HERE
          image: cloudflare/cloudflared:latest
          name: cloudflared
          livenessProbe:
            httpGet:
              # Cloudflared has a /ready endpoint which returns 200 if and only if
              # it has an active connection to the edge.
              path: /ready
              port: 2000
            failureThreshold: 1
            initialDelaySeconds: 10
            periodSeconds: 10
? Replace YOUR_TOKEN_HERE with the token you copied from the Cloudflare dashboard.
Then apply it with:
kubectl apply -f ./cloudflare-tunnel.yaml
Step 4: Add a Public Hostname in Cloudflare
Once your tunnel shows as “Healthy” in the dashboard:
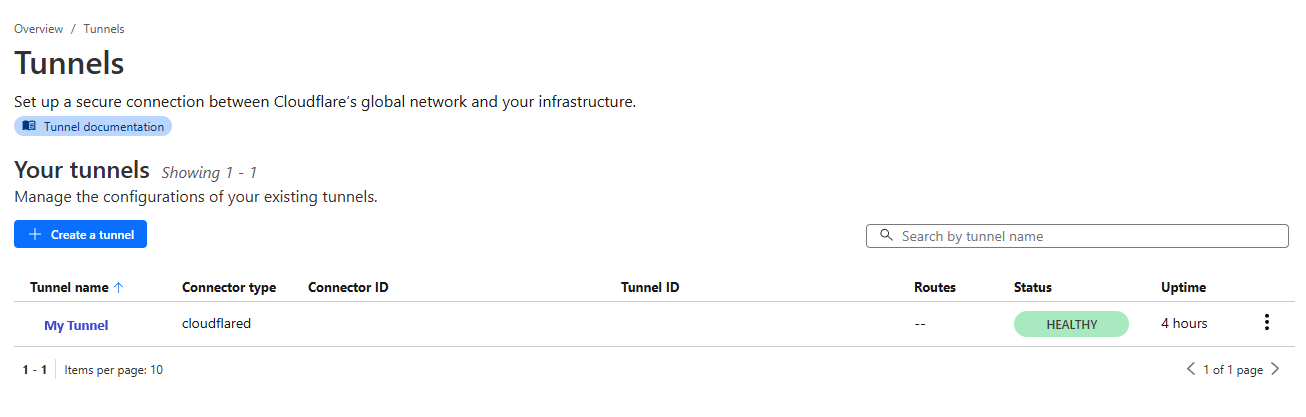
- Click the three dots next to the tunnel name and select “Configure”.
- Under “Public Hostname”, click “Add a Public Hostname”.
- Choose a hostname like
ghost.mysite.com. - For the service, use the DNS name of your Kubernetes service (e.g.,
ghost-app-lb).

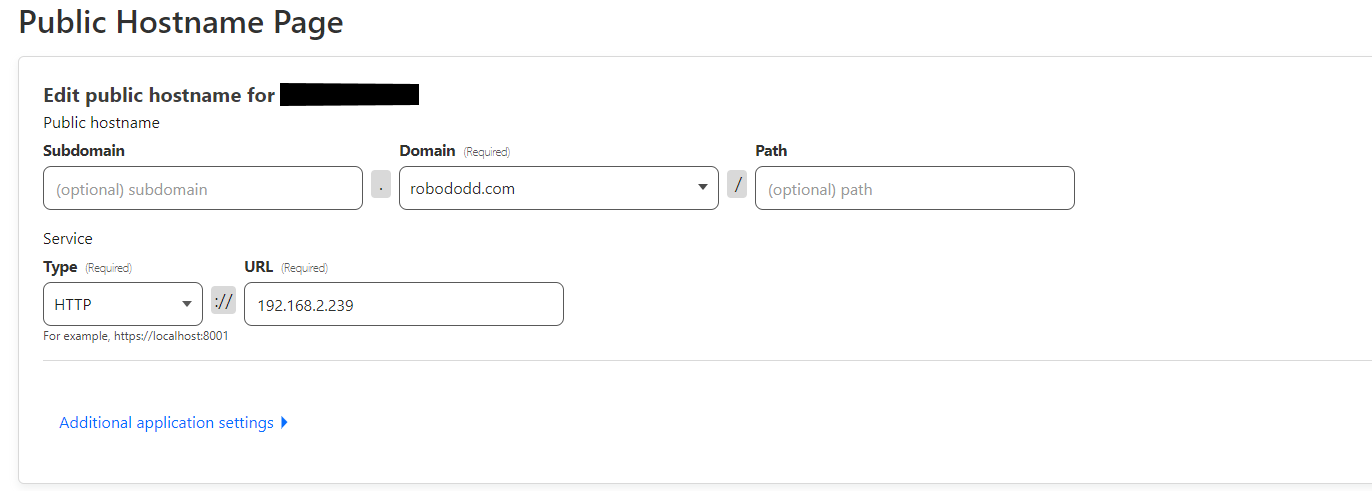
Cloudflare will route traffic from the public hostname to your internal service — just like that.
Conclusion
Using Cloudflare Tunnels with k3s is a lightweight and secure way to expose your services — no MetalLB, no port forwarding, no headaches. This approach is especially useful for self-hosted apps like Ghost, Uptime Kuma, or even your custom tools.