Running your own Plex server allows you to centralize and access your media collection from anywhere. Using Kubernetes with k3s offers a lightweight yet powerful platform to manage your Plex server in a scalable, resilient way. In this guide, I’ll walk you through deploying a Plex server on k3s using a manifest that’s been tried and tested in production.
Why Use k3s for Plex?
K3s is a lightweight Kubernetes distribution, perfect for home labs, small-scale clusters, or edge environments. It’s easy to set up, requires minimal resources, and integrates seamlessly with various Kubernetes tools and services. By running Plex on k3s, you can take advantage of Kubernetes’ powerful orchestration capabilities, such as automated scaling, self-healing, and easy deployment.
Prerequisites
Before we dive into the setup, make sure you have the following:
- k3s Cluster: Ensure you have a running k3s cluster. If you’re just getting started with k3s, you can follow the guide I wrote here https://robododd.com/atomic-pi-kubernetes-cluster/
- Persistent Storage: Plex requires persistent storage for its configuration files and media library. You’ll need to configure Persistent Volume Claims (PVCs) and Persistent Volumes (PVs) in your k3s cluster.
- NFS Server (optional): If you plan on using an NFS server to store your media files, ensure it’s set up and accessible from your k3s nodes.
- Intel-based Hardware for Transcoding (optional but recommended): If you have Intel hardware that supports Quick Sync Video (QSV), you can leverage hardware transcoding for better performance. In this setup, I’m using an Intel N100 processor on the Beelink EQ-12.
- MetalLB for Load Balancing: MetalLB is used to provide a LoadBalancer service within your local network by assigning local area network IPs to your services. If you haven’t set up MetalLB, you can follow my guide here to get started.
- Plex Claim Token: You’ll need to visit Plex’s claim page to obtain a claim token that you’ll use to link your Plex server to your Plex account during setup.
Hardware I Recommend
Below are Amazon links to hardware I’ve personally used and recommend. These Beelink mini PCs are affordable, energy-efficient, and feature hardware transcoding, making them great options for a variety of setups.
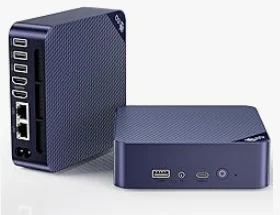
Beelink EQ14
- CPU: Intel N150 up to 3.6GHz
- RAM: 16GB
- Storage: 500GB SSD
- Features: Dual LAN, Hardware Transcoding, Low Power
- Price: $189.00 (on sale)
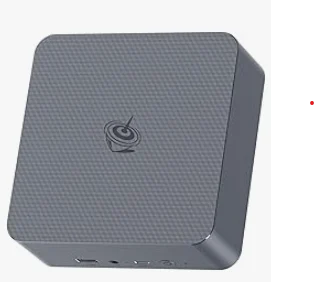
Beelink EQ12
- CPU: Intel Core 1220P (up to 4.4GHz)
- RAM: 24GB
- Storage: 500GB SSD
- Features: Dual LAN
- Price: $259.00
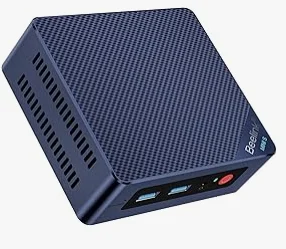
Beelink Mini S12 Pro
- CPU: N100 (4C/4T, Up to 3.4GHz)
- RAM: 16GB
- Storage: 500GB SSD
- Features: Energy Efficient
- Price: $159.00 (on sale)
The Manifest
Here’s the manifest I use to deploy Plex on k3s:
apiVersion: apps/v1
kind: Deployment
metadata:
  name: plex
spec:
  progressDeadlineSeconds: 600
  replicas: 1
  revisionHistoryLimit: 3
  selector:
    matchLabels:
      app: plex
  strategy:
    type: Recreate
  template:
    metadata:
      labels:
        app: plex
    spec:
      containers:
      - name: plex
        image: plexinc/pms-docker:latest
        imagePullPolicy: Always
        securityContext:
          privileged: true
        ports:
        - containerPort: 32400
          name: plex
        - containerPort: 8324
          name: plex-roku
        - containerPort: 32469
          name: plex-dlna
        - containerPort: 1900
          name: plex-upnp
          protocol: UDP
        - containerPort: 32410
          name: plex-gdm-1
          protocol: UDP
        - containerPort: 32412
          name: plex-gdm-2
          protocol: UDP
        - containerPort: 32413
          name: plex-gdm-3
          protocol: UDP
        - containerPort: 32414
          name: plex-gdm-4
          protocol: UDP
        volumeMounts:
        - name: config
          mountPath: /config
        - mountPath: /Films
          name: plex-nfs
          readOnly: true
          subPath: video-movies
        - mountPath: /TVShows
          name: plex-nfs
          readOnly: true
          subPath: video-tv
        - name: plex-transcode
          mountPath: /transcode
        - name: dev-dri
          mountPath: /dev/dri
          readOnly: true
        env:
        - name: ADVERTISE_IP
          value: 'http://192.168.2.5:32400/,https://my-plex-domain'
        - name: ALLOWED_NETWORKS
          value: 192.168.0.0/16,10.0.0.0/8
        - name: PLEX_CLAIM
          value: claim-your-claim
        - name: PLEX_UID
          value: "1000"
        - name: PLEX_GID
          value: "1000"
        - name: HOSTNAME
          value: plex
      volumes:
      - name: config
        persistentVolumeClaim:
          claimName: plex-pvc
          readOnly: false
      - name: plex-nfs
        hostPath:
          path: /nfs
      - name: plex-transcode
        persistentVolumeClaim:
          claimName: plex-transcode
      - name: dev-dri
        hostPath:
          path: /dev/dri
---
apiVersion: v1
kind: Service
metadata:
  name: plex
spec:
  type: LoadBalancer
  ports:
  - port: 32400
    targetPort: plex
    name: plex
  - port: 8324
    targetPort: plex-roku
    name: plex-roku
  - port: 32469
    targetPort: plex-dlna
    name: plex-dlna
  - port: 1900
    targetPort: plex-upnp
    name: plex-upnp
    protocol: UDP
  - port: 32410
    targetPort: plex-gdm-1
    name: plex-gdm-1
    protocol: UDP
  - port: 32412
    targetPort: plex-gdm-2
    name: plex-gdm-2
    protocol: UDP
  - port: 32413
    targetPort: plex-gdm-3
    name: plex-gdm-3
    protocol: UDP
  - port: 32414
    targetPort: plex-gdm-4
    name: plex-gdm-4
    protocol: UDP
  selector:
    app: plex
  loadBalancerIP: 192.168.2.5
NFS server for storing data
I’m using an NFS server to store all my movies and TV shows in this k3s setup. For details on setting up an NFS server, check out the link below.

Leveraging Hardware Transcoding
If you’re using Intel-based hardware like the N100 processor on the Beelink EQ-12, you can take advantage of hardware transcoding by mounting the /dev/dri directory into the Plex container. This allows Plex to access the GPU for hardware-accelerated transcoding, significantly improving performance, especially when streaming to multiple devices.
In the manifest, the dev-dri volume mount is configured as follows:
volumeMounts:
- name: dev-dri
  mountPath: /dev/dri
  readOnly: true
This setup should work for any Intel-based transcoding, enabling you to offload the transcoding workload from the CPU to the GPU, which is especially beneficial in environments with limited processing power.
PersistentVolumeClaims
To persist your Plex configuration and handle transcoding, you’ll need to create two PersistentVolumeClaims (PVCs). Here’s how they’re defined in the manifest:
apiVersion: v1
kind: PersistentVolumeClaim
metadata:
  name: plex-pvc
spec:
  accessModes:
    - ReadWriteOnce
  storageClassName: local-path
  resources:
    requests:
      storage: 10Gi
---
apiVersion: v1
kind: PersistentVolumeClaim
metadata:
  name: plex-transcode
spec:
  accessModes:
    - ReadWriteOnce
  storageClassName: local-path
  resources:
    requests:
      storage: 100Gi
- plex-pvc: This PVC is used for storing Plex’s configuration files. It requests 10Gi of storage, which should be sufficient for most setups.
- plex-transcode: This PVC handles the transcoding data, requesting 100Gi of storage. This is where Plex will store temporary files during transcoding, so it’s important to allocate sufficient space.
Setting Up MetalLB
For the LoadBalancer service to issue IP addresses within your local area network, MetalLB is used. MetalLB is a load-balancer implementation for bare metal Kubernetes clusters, providing a network load-balancer implementation. It allows services to get a local area network IP address so that they can be accessed directly without the need for NodePort or external proxies.
If you haven’t set up MetalLB yet, you can follow my detailed guide here to get it configured.
Final Steps
Apply the Manifest: Save the manifest to a file, such as plex-deployment.yaml, and apply it to your k3s cluster using kubectl
kubectl apply -f plex-deployment.yaml
Access Plex: Once the deployment is up and running, you can access Plex through the LoadBalancer IP defined in the manifest. In this case, it’s http://192.168.2.5:32400/.
Configure Plex: Open the Plex web interface and follow the setup wizard. Make sure to configure your libraries, users, and any other settings according to your preferences.
Conclusion
Deploying Plex on k3s offers a scalable, resilient solution for managing your media server. With Kubernetes’ capabilities, you can easily manage and expand your setup as your media collection grows. Whether you’re running a home lab or a small-scale production environment, k3s provides the flexibility and power needed to ensure your Plex server is always available.