Intro
In this post, I’ll walk you through the steps needed to install K3s, a lightweight Kubernetes distribution. For this tutorial, I’m setting it up on an Atomic Pi, a low-cost and low-power single-board computer, but you can use any similar device like a small PC or a Raspberry Pi.
Whether you’re a developer looking to test a new application or a system administrator wanting to learn more about Kubernetes, this guide will provide the essential information to get you started.
Hardware I Recommend
Below are some Amazon links to hardware I’ve personally used and recommend. These mini PCs are affordable and energy-efficient. The Intel machines have hardware transcoding, really good if you want to run a plex container.
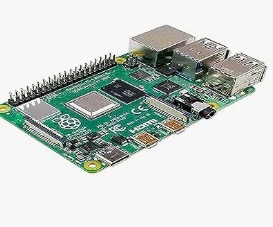
Raspberry Pi 4 Model B
- CPU: Quad-core Cortex-A72 (ARM v8) 64-bit SoC @ 1.5GHz
- RAM: 2GB, 4GB, or 8GB
- Storage: MicroSD Card Slot
- Features: Dual 4K HDMI, Low Power, Broad OS Support
- Price: $61.99
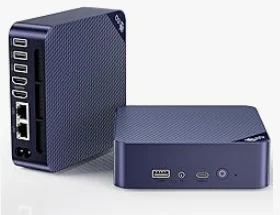
Beelink EQ14
- CPU: Intel N150 up to 3.6GHz
- RAM: 16GB
- Storage: 500GB SSD
- Features: Dual LAN, Hardware Transcoding, Low Power
- Price: $189.00 (on sale)
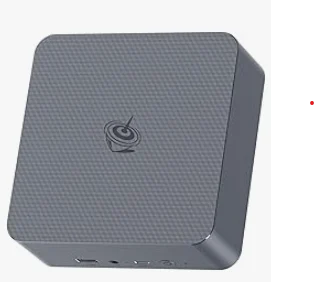
Beelink EQ12
- CPU: Intel Core 1220P (up to 4.4GHz)
- RAM: 24GB
- Storage: 500GB SSD
- Features: Dual LAN
- Price: $259.00
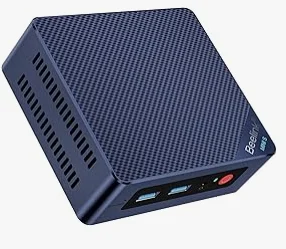
Beelink Mini S12 Pro
- CPU: N100 (4C/4T, Up to 3.4GHz)
- RAM: 16GB
- Storage: 500GB SSD
- Features: Energy Efficient
- Price: $159.00 (on sale)
Ubuntu
First, you’ll need to download Ubuntu Server from the official website: Ubuntu Server Download. As of 2026, 24.04 LTS is the current long-term release — the steps below apply unchanged.
Create a Bootable USB (Windows)
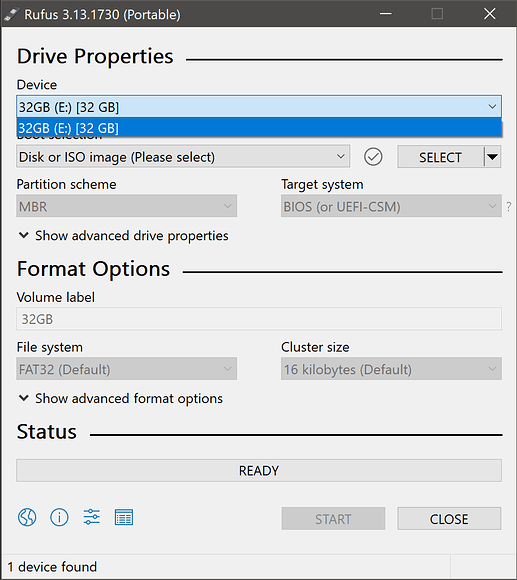
To create a bootable USB drive on Windows, I recommend using Rufus.
- Open Rufus and select your flash drive from the “Device” drop-down menu.
- Insert your USB stick.
- In the “Boot selection” section, click the “Select” button and choose the Ubuntu ISO file you downloaded.
- Click the “Start” button to begin creating the bootable flash drive.
For more detailed instructions, check out this article.
Install Ubuntu on Your System
- Insert the flash drive into the system and power it on.
- Press the “Del” key to enter the BIOS settings. (Atomic Pi specific)
- Change the boot order to prioritize the flash drive.
- Save the changes and exit the BIOS.
- The system will boot from the flash drive and start the Ubuntu installer.
- Follow the on-screen instructions to complete the installation process.
- Ensure SSH is enabled for remote access.
Note: It’s recommended to back up any important data on the Your system before installing Ubuntu, as the installation process will erase all existing data.
Install Nodes
Master Node Setup
Connect Using SSH
Connect to your master node:
Configure Environment Variables
Disable servicelib and traefik since we will use MetalLB for load balancing.
export K3S_KUBECONFIG_MODE="644"
export INSTALL_K3S_EXEC="--disable servicelb --disable traefik"
Install K3s
Run the following command to install K3s:
curl -sfL https://get.k3s.io | sh -
Uninstall (if needed)
To uninstall K3s, use the script below:
/usr/local/bin/k3s-uninstall.sh
Check the Status
Verify that K3s is running:
sudo systemctl status k3s
Get the Access Token
Workers need an auth token to join the cluster. Retrieve it with this command:
sudo cat /var/lib/rancher/k3s/server/node-token
Worker Node Setup
Configure Environment Variables
export K3S_KUBECONFIG_MODE="644"
export K3S_URL="https://192.168.1.101:6443"
export K3S_TOKEN="Put the Master node token here!!"
Install K3s
Install K3s on the worker node:
curl -sfL https://get.k3s.io | sh -
Uninstall (if needed)
To uninstall K3s on the worker node, use the script below:
/usr/local/bin/k3s-agent-uninstall.sh
Checking the Cluster
Use the following command to get the status of all resources in the cluster:
kubectl get all -o wide
For more kubectl commands, refer to the Kubernetes documentation.
Setup Local Workstation Kubectl
I find it easier to apply manifests locally rather than through SSH. Here are the steps to control your cluster from your local machine.
Get the Tools
Download the necessary tools from the Kubernetes website.
Copy Configuration
Copy the kube config from your master node to your local machine:
scp [email protected]:/etc/rancher/k3s/k3s.yaml ~/.kube/config
Replace the IP
Open the configuration file (~/.kube/config or C:\users\myuser\.kube\config) and replace 127.0.0.1 with your master node’s IP address (192.168.1.100).
After this, you should be able to run kubectl commands from your local machine.
Verify with:
kubectl get all -o wide
Conclusion
Now that your cluster is set up, check out my Uptime Kuma Article to test out your new k3s cluster: